|
Product Details:
Payment & Shipping Terms:
|
| Product: | Air Operated Diaphragm Pump | Maximum Outlet Pressure: | 0.69mpa |
|---|---|---|---|
| Temperature Limits: | 32°- 175°F | Noise Level: | <70db |
| Name: | Polypropylene Diaphragm Pump | Application: | Corrosive Liquid Conveying |
| Flow Rate: | 0-20m3/h | Material Of Diaphragm: | Teflon |
| Head: | 30m | ||
| Highlight: | 1/4'' Polypropylene Diaphragm Pump,70db Polypropylene Diaphragm Pump |
||
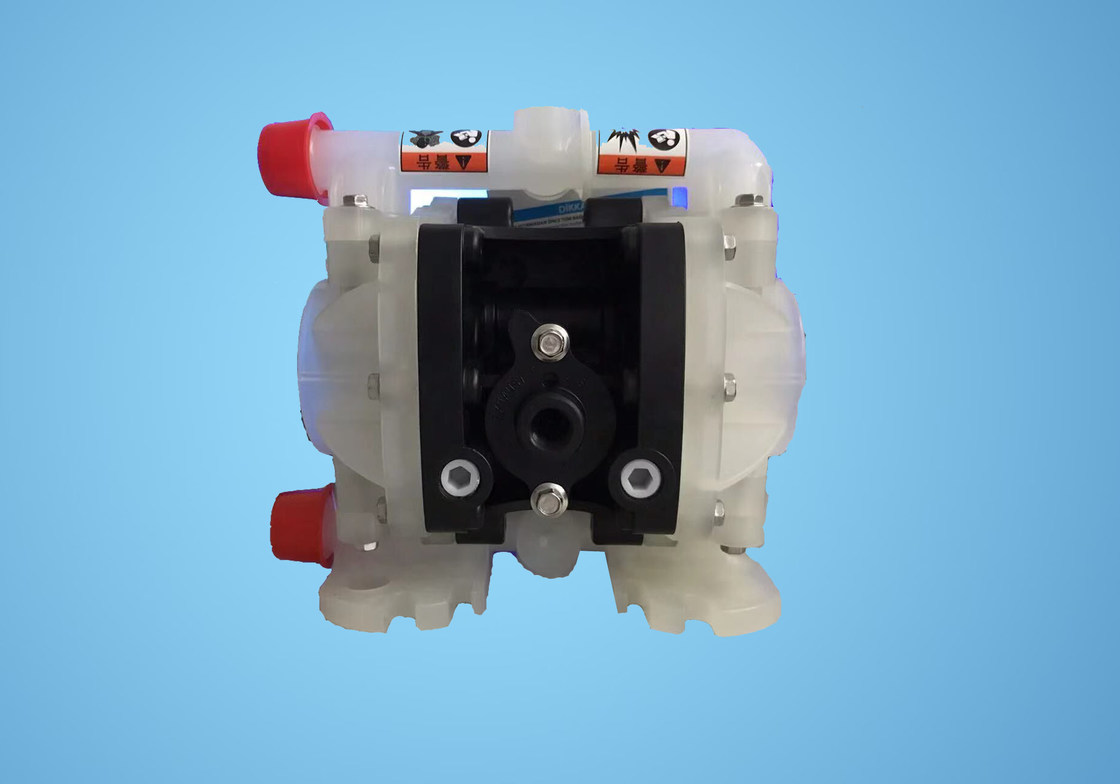
1/4" air operated Diaphragm Pump For Corrosive Liquid Conveying
Low Noise Polypropylene Diaphragm Pump For Chemical solvent corrosion
Polypropylene Diaphragm Pump Introduction
Air diaphragm pump(also know as a Membrane pump, air operated double diaphragm pump(AOOD) or pneumatic diaphragm pump)that uses a combination of the reciprocating action of a rubber,thermoplastic or diaphragm and suitable valves either side of the diaphragm (check valve,butterfly valves,flap valves,or any other form of shut-off valves) to pump a fluid.
Polypropylene diaphragm pump specification:
1/4" & 1/2" & 1" &1.5" & 2" & 3"
Air diaphragm pump
1. No leakage
2. Good self-priming performance
3. Conveying various media
| Item | Description | Unit | Reference Figure |
| 1 | SIZE air PUMP | INCH | 0.25 |
| 2 | Maximum flow rate | 1/Min | 27 |
| 3 | Maximum lift | M | 70 |
| 4 | Maximum outlet pressure | Mpa | 0.69 |
| 5 | Maximum particle size | mm | 3 |
| 6 | Weight | kg | 2.3 |
| 7 | Noise level | db | <70 |
BG06 X X - X X X - X (model selection)
Form of pipe mouth:A-BSP B-NPT(F) C-Flange
Diaphragm material:9 – Santoprene H – Hytrel T - PTFE/Santoprene
Ball material:9 -Santoprene H – Hytre T – PTFE A - Acetal
Ball seat material:P/K –Polypropylene/Kynoar SS –Stainless Steel
Pump material: SS –Stainless Steel AL –Aluminum Alloy CI- Carbon Steel P/K –Polypropylene/Kynoar
Maximum Applied Temperature Limits (diaphragm / ball / seal material)
Acetal ···············································40°- 150°F (4.4- 65.5°C)
Santoprene·········································-40°- 225°F (-40°- 107.2°C) ·················································40°- 220°F (4.4°- 104°C) Nitrile···················································10°- 180°F (-12°- 82°C) Viton······················································-40°- 350°F (-40°-176.6°C) Hytrel·····················································-20°-150°F (-12°- 93°C) Kynar······················································10°-200°F (-28.9°- 65.5°C) Polypropylene···········································32°- 175°F (0-79.4°C)
Product Usage
1. Pump peanut butter, kimchi, mashed potatoes, small red sausage, jam apple pulp, chocolate, etc.
2. Pumping paint, gum, and pigment.
3, adhesives and glue, all types can be pumped.
4, a variety of tiles, porcelain, bricks and pottery glaze.
5. After the oil well is drilled, pump the sediment and grout.
6. Pump various emulsions and fillers.
7. Pumping all kinds of age.
8. Use the pump as the tanker, and the barge clears the tank to absorb the age.
9, hops and fermented powder slurry, syrup, sugar dense.
10. Pumping water from mines, tunnels, tunnels, beneficiation, and slag. Pumping cement grout and mortar.
11, a variety of rubber pulp.
12. Various abrasives, corrosives, petroleum and mud, cleaning grease and general containers.
13, a variety of highly toxic, flammable, volatile liquids.
Installation dimensions:
![]()
a) First, take the pump out of the pipeline system and drain the materials in the pump. b) Place the pump in a clean working environment. c) Remove the water outlet pipe (1) from the pump, and then take out the balls (2), O cups (3) and (47) and ball sockets (4) from the upper end of the liquid cap (5) in turn. Then, place the pump upside down and remove the water inlet pipe (11) to take out the O-ring cups (3) and (47), ball seats (4) and ball seats (2) from the liquid cap (5). d) Loosen the bolts around the two liquid covers and remove the liquid cover (5). e) Loosen the diaphragm screws (10) and remove the diaphragm washers (7), (8) and the diaphragm (6) from both ends. The lip seal (25) can be replaced by removing the diaphragm rod (23). f) Loosen the bolt (39) first, and then remove the air valve housing (38), wind deflector (42), sealing gasket (40) and (41). g) Take out the valve sheet (36) and valve plate (37) from the air valve sleeve (38).
h) Remove the clamp (29), take out the limit end cover (31) from both ends of the air valve sleeve (38), and replace the cup (30) as required. i) After pushing the valve element (35) out of the air valve sleeve (38) by hand, the lip packing (33) can be checked. j) First loosen the 4 bolts (16) that fix the cylinder head, then remove the cylinder heads (14) and (18) at both ends, and remove the O-ring cover (17). k) Remove the sealing gasket (19) from the groove of the motor housing (15). l) Eject the guide rod (22) and trigger rod (45) from the motor housing (15), and replace the lip packing (20) on the trigger rod or the O-ring (44) on the guide rod. Since the assembly steps and disassembly steps of the diaphragm pump are incompatible, please pay attention to the following points during the assembly process: 1) All sealing elements and their contact parts must be coated with lubricating oil. 2) Before use, please carefully check all sealing elements for damage, such as surface damage. If it is damaged, replace it with a new one. 3) The lip direction of lip type packing (20) (, 25), (33) shall be consistent with the direction shown in the figure. 4) The bolts on the liquid cover shall be tightened diagonally to achieve better sealing effect.
Troubleshooting 1. Some liquid is discharged from the exhaust port with the airflow. Check the diaphragm for damage. Check the diaphragm screws for looseness 2. Check whether the suction pipe connection is well sealed. Check whether the connection between the suction pipe and the intake manifold is well sealed. Check the O-ring between the intake manifold and the liquid cap. Check whether the diaphragm screws are loose. Check whether the air supply is stable when the pump output is low.
Check whether the inlet/outlet is blocked. Check the air tightness of the intake manifold connection connector. The check ball is not stuck on the valve seat or the ball is not fixed correctly. 4. When there is no reciprocating movement, air is discharged from the exhaust port. Check the seal ring (33) on the spool (35). Check the seal ring (20) on the trigger lever (45). Check the seal ring (25) on the diaphragm connecting rod
Contact Person: Mr. ALLSON
Tel: 008618122100289